Friday, December 21, 2012

Product Review - Eyeko Skinny Liquid Eyeliner

In yesterday's entry, I mentioned that I lined my upper eyelid with the Eyeko Skinny Liquid Eyeliner in purple and that I was going to write a review about it.

When I taught my makeup workshop at an event this summer, a participant told me about Birchbox and the Eyeko eyeliner (*wave at Gina*). I had forgotten about the eyeliner until I received the Eyeko Skinny Liquid Eyeliner in my Birchbox subscription this month.

When I saw that it was a purple color, I have to admit that I was disappointed as I've never worn a colored eyeliner, remembering the awful look that we had in the 80s with colored eyeliners (some may be too young to remember).  So when I did the pink and purple makeup look, I thought that it was a good time to try out the color and the product.  I gotta say that I was pleasantly surprised with the color! It really wasn't gaudy at all!  It was a nice eggplant color that complemented the makeup scheme real well. It also wasn't that much different than if I had lined my eye with black. I mean, sure, you could tell that it wasn't exactly black but you couldn't be 100% certain. Most importantly, it looked polished.  So the color redeemed itself.

The eyeliner comes in a variety of colors: black, navy, olive, purple, turquoise, and brown.  I don't know that I'd purchase any of the colors except maybe for brown and I'm intrigues by the turquoise... but I don't wear colors that would fit with turquoise very regularly.

Now as to the formulation and application. I was also extremely pleased with both. The product wasn't too liquid at all and it stayed put real well. It literally did not move AT ALL all night... and I was dancing at Greek Islands so it had every chance to melt off my face.  But it didn't.

The application was also very easy. As can be seen on the picture here, the tip is very fine so it made for an easy application and it was easy to control exactly where and how much you were applying.

In a previous entry, I did a review of the Be a Bombshell eyeliner and said that it was the easiest thing to get if you are not used to working with liquid liner. Well, I take it back: this Eyeko Skinny Liquid Eyeliner is. The Be a Bombshell one is a very close second, though.

The price is 15$, which is par for similar products.  My only con about this product is that it's not available everywhere. I found it on Birchbox (where the purple color was an exclusive, actually and they have all the available colors) and at Sephora (where they only have it in black).

So the question that I always ask myself at the end: would I buy this again. This one gets a big whole YES! I really loved it. I'm actually debating whether, when I run out of my e.l.f. gel, whether I will purchase it again or the Eyeko Skinny Liquid Eyeliner in black.

Thursday, December 20, 2012

Pink and Purple makeup


I wear this makeup scheme for work and when I dance at Greek Islands.  Here's how I did it:

  1. I applied Shadow Insurance by Too Faced all over the eyelid to the brow bone, including at the lower lash line.
  2. I applied Swish by MAC on the eyelid and at the lower lash line.
  3. I applied Nocturnelle by MAC at the crease and at the outer corner of the lower lash line.
  4. I applied Butterfly by Bare Escentuals at the brow bone.
  5. I applied Aspen Summit by Sephora at the inner corner of the lash line.
  6. Normally, I apply my regular gel liner by e.l.f. as my liner on the upper and lower lash lines. However, this time, I applied Eyeko Skinny Liquid Eyeliner in purple (I had received it in my Birchbox subscription and will do a review on it) on the eyelid and the black gel liner at the lower lash line.
  7. Finally, good old mascara, of course!

Wednesday, December 19, 2012

Makeup Look - Red makeup


I've been doing performances for Holidays/Winter haflas lately so I came up with this makeup scheme for it. I decided to go with red because my costume was red and black and, well, I just felt like it. ;)  So how did I do that?

And I have to apologize as it seems that most of the exact eye shadows that I used were discontinued... but you can use whichever similar color, of course.)

  1. I applied my eye primer all over the eyelid to the brow and a little at the lower lash line. I use Shadow Insurance by Too Faced.
  2. I applied a creamy red eye shadow on the eyelid. I used the Flammable paint tube by MAC. It is unfortunately no longer available. However, any red color would do: it's just a base for the glitter.
  3. I also applied some red eye shadow at the lower lash line.
  4. I applied the Glitter Glue by Too Faced on the eyelid (one eyelid at a time) and then layered red glitter over it. I used Antoinette by Medusa's Makeup.
  5. I applied a deep burgundy eye shadow at the crease, wrapping at the outer corner of the lower lash line as well. The color that I used was Smoke Signal by MAC. It's unfortunately discontinued. (See below for a pic of the color.)
  6. I then applied a little bit of a black with copper accents where the red from the eyelid and the burgundy of the crease met to tie it together a bit more. The color that I used was Beauty Marked by MAC.
  7. I applied a soft yellow at the brow bone. The color that I used was Butterfly by Bare Escentuals.
  8. I applied some white eye shadow at the inner corner of the eye (so a little on the side of the nose as well) and at the inner corner of the lower lash line. I used Aspen Summit by Sephora. The goal here is to brighten up the makeup a little.
  9. I then applied my gel liner (e.l.f.) at the upper lash line and in the water line of the lower lashes.
  10. Finally, I applied mascara.
Here is how some of the colors that are discontinued look like:

MAC Flammable Paint Tube


MAC Smoke Signal Pigment


Tuesday, December 18, 2012

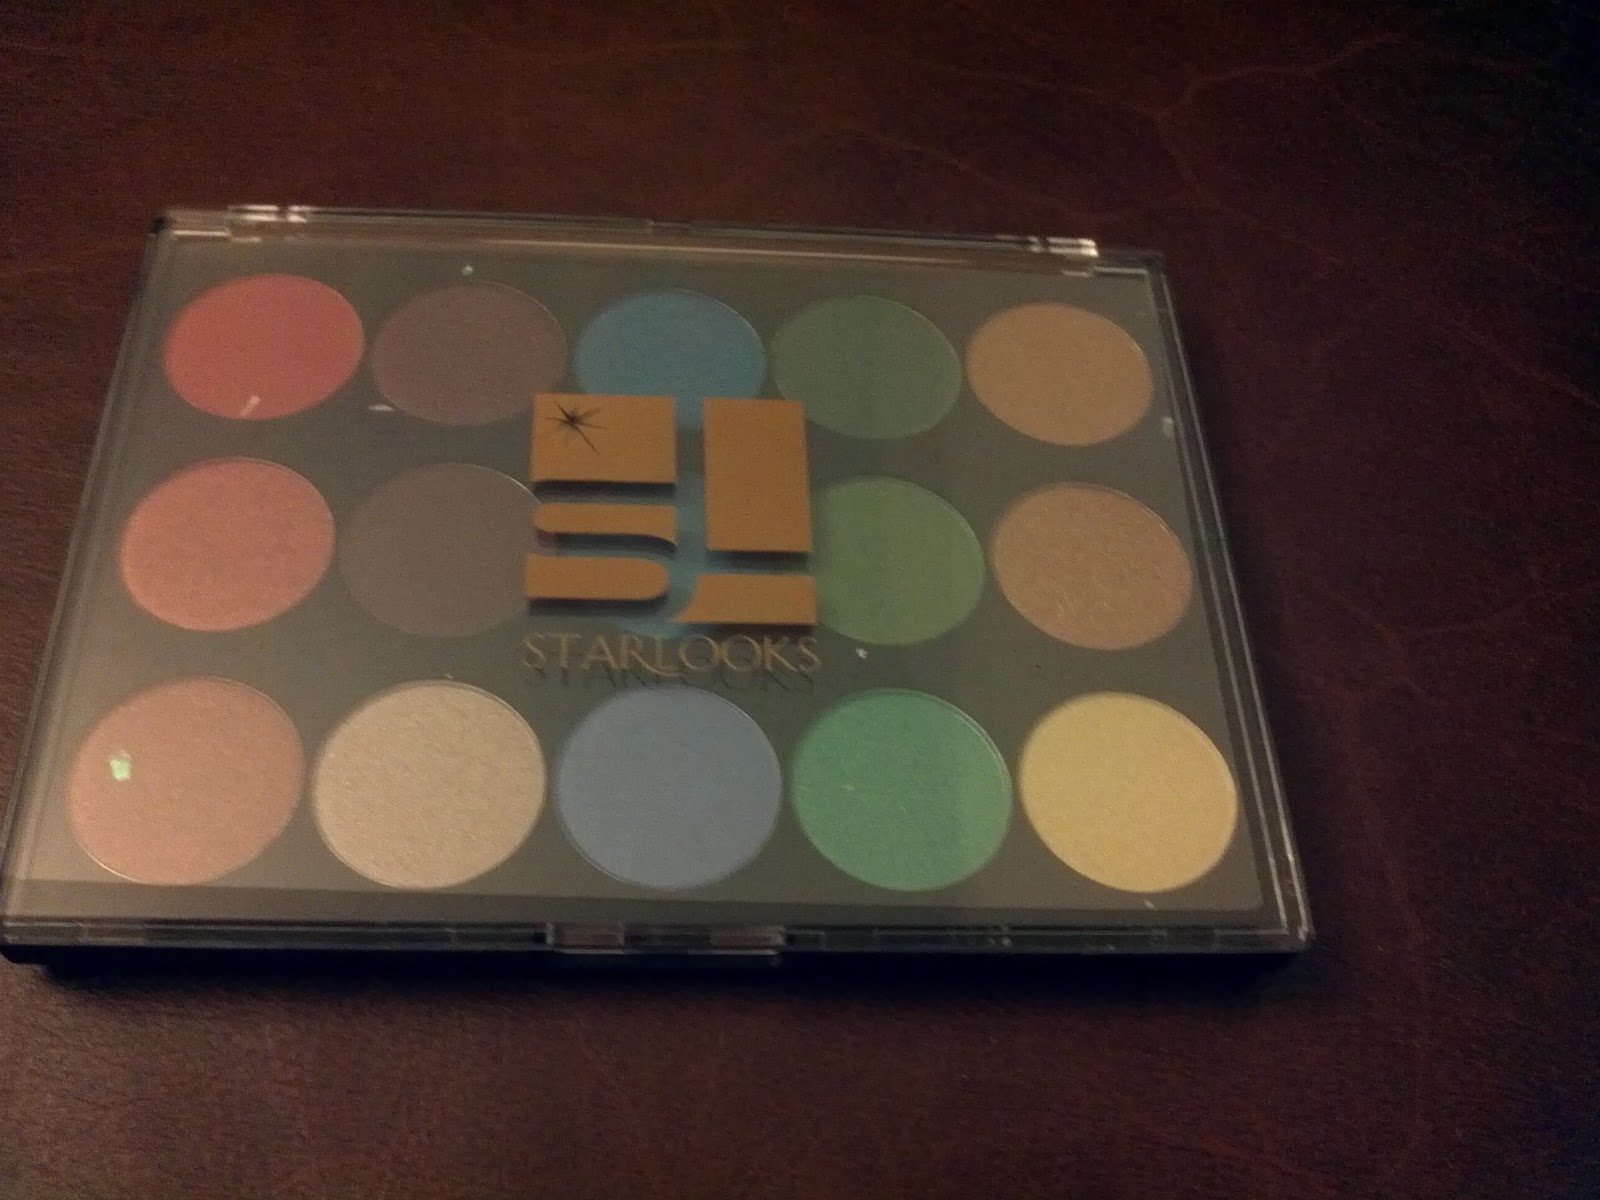
Product Review - Starlooks Palette

Back in November, I saw on the MakeUp Talk message board (www.makeuptalk.com) that this company called Starlooks has monthly "Starboxes" and that, in December, they would be sending out a full palette. The Starbox is a monthly subscription that costs 15$ per month plus s&h (16.96$ total). Starlooks is a makeup company so the boxes contain their own products. Now the enticing factor was that the full palette is priced at 99$ on their website and, yes, you got it for 15$. So it seemed like a good idea to try.

I received my palette a few weeks ago.


The packaging around the palette was both cute and cumbersome. It was cute because there was like snowflakes like confettis... but cumbersome because I have cats and those darn confettis started floating everywhere and I had to try to catch them all to prevent the kitties from munching on them.

The first thoughts when you see the palette is "there's only 15 eye shadows!" so it seems that, for the regular price of 99$, that's not enough... but then you notice that it's actually full size shadows (vs. regular palettes that have substantially smaller shadows) so then the price per shadow is reasonable.

That being said, in a previous entry, I talked about what to look for in a palette (see Palettes - What to look for). Well, this one wouldn't make my cut: you can do some tone on tone applications with it but it's hard to make a full look and I'd probably need to supplement the colors with something else from my makeup stash.  I think that part of the problem for me is that these colors are much brighter than what I'm used to wearing. However, I can see some great cabaret looks possible with this palette but, again, you'd probably need to supplement a little with something from your stash.

I did do a makeup scheme yesterday with only the palette (and eyeliner and mascara). Here's the look! (Pardon the dazed look in my face: I was having huge contact lenses issues.)

And I tried it again today (less eye issues, eh?).


I gotta say that, when I played with the eye shadow, I could tell from the first pat that it's good quality makeup: it goes on smooth and has a good payload. As I mentioned above, I had huge contact lenses issues that day, which made my eyes water quite a bit and most makeup vanishes off my eyelids when that happens but this one stayed on.

Now the 100$ question: would I pay 99$ for the palette? The answer is: probably not. But then again I wouldn't pay 99$ for most palettes. It just seems like quite the amount for me. (See, as a makeup junkie, you need to feed the addiction on a regular basis and so that'd be the budget for quite a while. ;) Or one could say that I have makeup ADD. :p)  That being said, if you have the money to splurge and you like the colors on a palette, it may be a good investment: 99$/15 colors makes it 6.60$ for each color, which is a great price for the quality of the eye shadows.

I will keep the Starlooks subscription for at least one more month to see what a regular month is like.

Monday, December 17, 2012

Product Review - Mirabella Primer

I received this primer as part of the Ipsy subscription this month.  I tried the Mirabella - Prime for Face and Eyes for the last few days. I used it as a primer under my foundation/beauty balm but I haven't tried it as an eye primer as I am sure of my regular primer's results.

This is going to be somewhat of a Smashbox Photo Finish Primer vs. Mirabella Prime for Face and Eyes kind of blog entry as I do have a comparison that I can draw. ;)

The Mirabella product comes in a tube, which makes getting the exact amount you want. This is much easier than the Smashbox one, which is a funky tube and I seem to always get more product out than I wanted.

The formulation of the Mirabella product seemed very similar to the Smashbox one to me. Although, I have to say that, if you have oily skin, you may prefer the Mirabella one as it felt a tad less greasy/silky than the Smashbox product but not by much. Again, if you have oily skin, you may appreciate the fact that you can manage more efficiently how much you're actually using so that may be another plus for you for the Mirabella product.

I will have to try it as an eye primer because I have to admit that I'm rather skeptical that I will like it in that capacity. I think that it will feel a bit too greasy on my eyelid but I'll have to test it.

Price-wise, it's 29$ for 0.43 oz for the Mirabella product whereas a 0.4 oz Smashbox is 17$ (or 1 oz for 36$). I did feel like I was using less Mirabella product so it may turn out that the 0.43 oz would be equivalent to the Smashbox full ounce one. Time will tell.

I think that I'll need a little more time to decide whether I would purchase the Mirabella product over the Smashbox one but I have to say that I preferred the texture and feel of the Mirabella product so, based on that, it has a high likelihood of winning my favors.

Mirabella website:
http://www.mirabellabeauty.com/

Thursday, December 13, 2012

Stage Makeup Problems - No eyebrows

(This post was given away by a friend on Facebook but here are my thoughts on the topic.)

Another issue that I often see about stage makeup is dancers appearing to have no eyebrows.

It's a little known fact but eyebrows are VERY expressive and will convey the emotions from afar. Just stand in front of a mirror and do different facial expression and notice how your eyebrows change.

I'm naturally blonde under this mane of black hair so I have to color my eyebrows or else it looks like I have none. So I'm covered in that I HAVE to work on my eyebrows every day.

Now, if you have your natural hair color (or a color close enough to your eyebrows anyway), you may feel like you don't need to do anything to them. But that is where the pitfall is: even when I would have my eyebrows dyed, I needed to fill in my eyebrows... and everyone needs to!

Given the amount of makeup that we were for stage, the eyebrows, being fine hair, will just virtually disappear from your face. I'll do a full blown entry on eyebrows (which is an area where I'm still improving my skills on) but, at a high level, you just need to fill them in. You can use an eye shadow color and an angled brush (works the best to not apply too much) or a pencil that is in a shade close to your hair color and just apply the color over your eyebrows.  That's all that you really need to do and then your eyebrows will be visible again.

Wednesday, December 12, 2012

Stage Makeup Problems - No lipstick

I've seen this time and time again: dancers who either aren't wearing any lipstick or a shade that makes it look like there is no lipstick.  Lips are one of the very expressive features on your face so having them stand out is necessary to convey the emotion.  I've seen a few pieces where the dancers made the conscious choice to appear as if they didn't have lips because it went with the concept of their piece and, obviously, that's fine. However, for anything else, please have lips!

Make sure that the color that you are using is contrasting enough with your skin color.  There should really be only a few shades that would be off limits.  If you're in doubt, you simply can apply the color and pull back from the mirror and see what it looks like. If you don't see clearly that there are lips, then the shade is not the one that you should be using. ;)

Note: I talk about lipstick here but it could be a lip gloss. Lip glosses actually may be bigger culprits than lipsticks for this phenomenon.