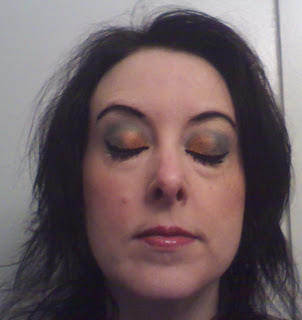
In the last entry, I talked about the basic "layered" application. This time, it's a split eyelid (again, my terminology) application. There are a number of considerations to keep in mind while doing this technique... but it can be a nice change from the same old application.
(In case someone is wondering, I used 2 top colors from the upper right corner of the Starlooks palette that I received in December.)
Basic principle
Why I call it "split eyelid" is that you're essentially splitting the eyelid in two (or three) sections. The size of the sections will change the look of the makeup and can even change the look of your eyes. So you'll want to try it out first and see whether it's the look that you want or if it is changing your eyes too much. While you can use a light and a dark color for this application, I find that the best use is for using 2 medium colors together.
You'll want to apply a light to medium color either all over the eyelid or from the inner corner up until about where the other color will start. Note that, if you apply all over the eyelid, it will affect (more or less) the shade of the color that you will apply on the outer corner.
Also note that, once you've applied the second color, you may need to re-apply one coat of the first color at the inner corner to bolster it. You'll know if you need to by the look of it.
Outer corner color
For the outer corner color, you'll want to apply a medium to dark color. Note that, the darker the color, the more it will close your eyes. So if you have small eyes, you'll want to go with a medium color over a dark one.
The start of the application can be at the following typical spots (approximates, of course): halfway, 1/3 from outer corner, 1/4 from outer corner. This is another way that you can trick your eyes into looking more or less small/big: if you wanted to apply a dark color but were afraid that it would close your eye too much, you could apply it at the 1/4 from the outer corner.
Note that, in the pics here, I applied the second color at about the halfway point.
Crease
This will totally be a personal thing but you'll have 3 options: 1) leave the crease blank; 2) bring each color into the crease; 3) use the outer corner at the crease as well. In the pics here, I did option 3.
Brow bone
I do like to still highlight the brow bone so I still apply a color on it but this is also optional.
Lower lash line
As you know by now, I like to apply shadow at the lower lash line as well for a more finished/complete look. I essentially replicate the same split on the lower lash line. So I'll apply the first color at the inner corner up to when the second color starts on the eyelid and then apply the second color from that spot up to the outer corner. You could bolster the either color by applying that one color all along the lower lash line.


No comments:
Post a Comment