Friday, December 21, 2012

Product Review - Eyeko Skinny Liquid Eyeliner

In yesterday's entry, I mentioned that I lined my upper eyelid with the Eyeko Skinny Liquid Eyeliner in purple and that I was going to write a review about it.

When I taught my makeup workshop at an event this summer, a participant told me about Birchbox and the Eyeko eyeliner (*wave at Gina*). I had forgotten about the eyeliner until I received the Eyeko Skinny Liquid Eyeliner in my Birchbox subscription this month.

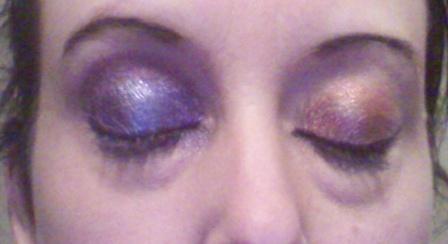
When I saw that it was a purple color, I have to admit that I was disappointed as I've never worn a colored eyeliner, remembering the awful look that we had in the 80s with colored eyeliners (some may be too young to remember).  So when I did the pink and purple makeup look, I thought that it was a good time to try out the color and the product.  I gotta say that I was pleasantly surprised with the color! It really wasn't gaudy at all!  It was a nice eggplant color that complemented the makeup scheme real well. It also wasn't that much different than if I had lined my eye with black. I mean, sure, you could tell that it wasn't exactly black but you couldn't be 100% certain. Most importantly, it looked polished.  So the color redeemed itself.

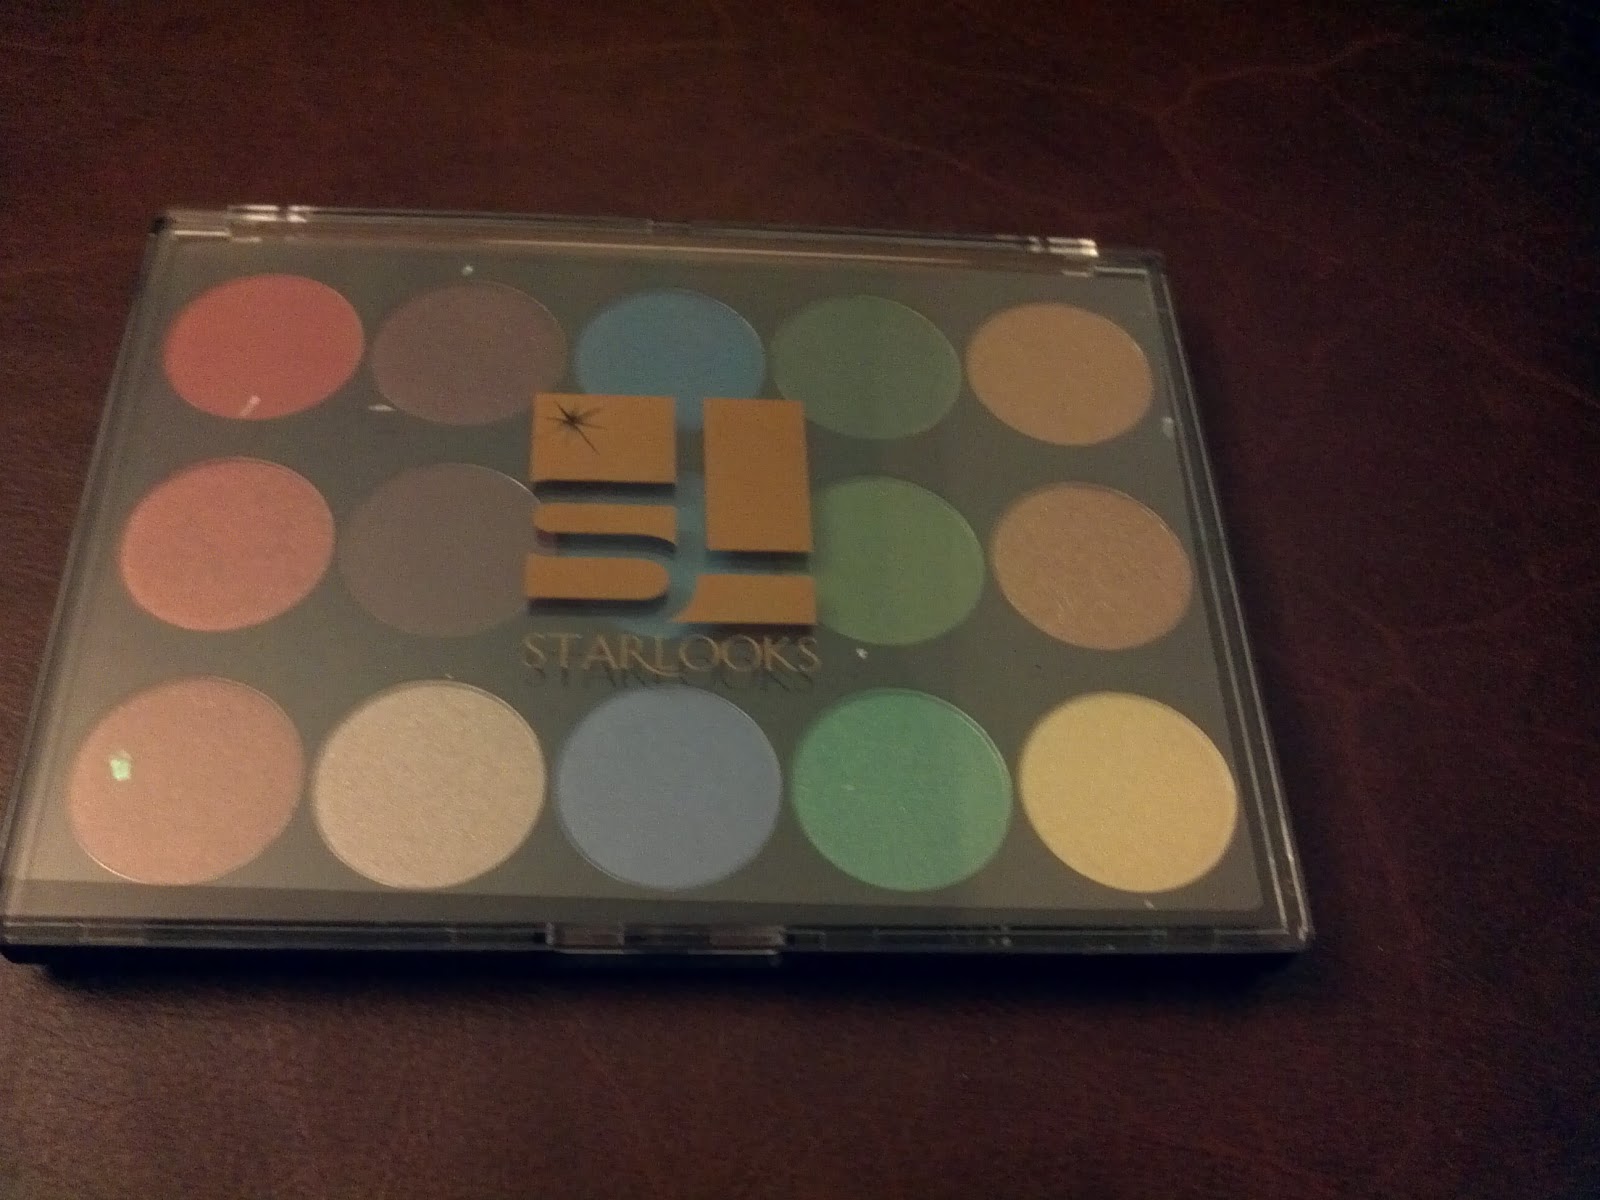
The eyeliner comes in a variety of colors: black, navy, olive, purple, turquoise, and brown.  I don't know that I'd purchase any of the colors except maybe for brown and I'm intrigues by the turquoise... but I don't wear colors that would fit with turquoise very regularly.

Now as to the formulation and application. I was also extremely pleased with both. The product wasn't too liquid at all and it stayed put real well. It literally did not move AT ALL all night... and I was dancing at Greek Islands so it had every chance to melt off my face.  But it didn't.

The application was also very easy. As can be seen on the picture here, the tip is very fine so it made for an easy application and it was easy to control exactly where and how much you were applying.

In a previous entry, I did a review of the Be a Bombshell eyeliner and said that it was the easiest thing to get if you are not used to working with liquid liner. Well, I take it back: this Eyeko Skinny Liquid Eyeliner is. The Be a Bombshell one is a very close second, though.

The price is 15$, which is par for similar products.  My only con about this product is that it's not available everywhere. I found it on Birchbox (where the purple color was an exclusive, actually and they have all the available colors) and at Sephora (where they only have it in black).

So the question that I always ask myself at the end: would I buy this again. This one gets a big whole YES! I really loved it. I'm actually debating whether, when I run out of my e.l.f. gel, whether I will purchase it again or the Eyeko Skinny Liquid Eyeliner in black.

Thursday, December 20, 2012

Pink and Purple makeup


I wear this makeup scheme for work and when I dance at Greek Islands.  Here's how I did it:

  1. I applied Shadow Insurance by Too Faced all over the eyelid to the brow bone, including at the lower lash line.
  2. I applied Swish by MAC on the eyelid and at the lower lash line.
  3. I applied Nocturnelle by MAC at the crease and at the outer corner of the lower lash line.
  4. I applied Butterfly by Bare Escentuals at the brow bone.
  5. I applied Aspen Summit by Sephora at the inner corner of the lash line.
  6. Normally, I apply my regular gel liner by e.l.f. as my liner on the upper and lower lash lines. However, this time, I applied Eyeko Skinny Liquid Eyeliner in purple (I had received it in my Birchbox subscription and will do a review on it) on the eyelid and the black gel liner at the lower lash line.
  7. Finally, good old mascara, of course!

Wednesday, December 19, 2012

Makeup Look - Red makeup


I've been doing performances for Holidays/Winter haflas lately so I came up with this makeup scheme for it. I decided to go with red because my costume was red and black and, well, I just felt like it. ;)  So how did I do that?

And I have to apologize as it seems that most of the exact eye shadows that I used were discontinued... but you can use whichever similar color, of course.)

  1. I applied my eye primer all over the eyelid to the brow and a little at the lower lash line. I use Shadow Insurance by Too Faced.
  2. I applied a creamy red eye shadow on the eyelid. I used the Flammable paint tube by MAC. It is unfortunately no longer available. However, any red color would do: it's just a base for the glitter.
  3. I also applied some red eye shadow at the lower lash line.
  4. I applied the Glitter Glue by Too Faced on the eyelid (one eyelid at a time) and then layered red glitter over it. I used Antoinette by Medusa's Makeup.
  5. I applied a deep burgundy eye shadow at the crease, wrapping at the outer corner of the lower lash line as well. The color that I used was Smoke Signal by MAC. It's unfortunately discontinued. (See below for a pic of the color.)
  6. I then applied a little bit of a black with copper accents where the red from the eyelid and the burgundy of the crease met to tie it together a bit more. The color that I used was Beauty Marked by MAC.
  7. I applied a soft yellow at the brow bone. The color that I used was Butterfly by Bare Escentuals.
  8. I applied some white eye shadow at the inner corner of the eye (so a little on the side of the nose as well) and at the inner corner of the lower lash line. I used Aspen Summit by Sephora. The goal here is to brighten up the makeup a little.
  9. I then applied my gel liner (e.l.f.) at the upper lash line and in the water line of the lower lashes.
  10. Finally, I applied mascara.
Here is how some of the colors that are discontinued look like:

MAC Flammable Paint Tube


MAC Smoke Signal Pigment


Tuesday, December 18, 2012

Product Review - Starlooks Palette

Back in November, I saw on the MakeUp Talk message board (www.makeuptalk.com) that this company called Starlooks has monthly "Starboxes" and that, in December, they would be sending out a full palette. The Starbox is a monthly subscription that costs 15$ per month plus s&h (16.96$ total). Starlooks is a makeup company so the boxes contain their own products. Now the enticing factor was that the full palette is priced at 99$ on their website and, yes, you got it for 15$. So it seemed like a good idea to try.

I received my palette a few weeks ago.


The packaging around the palette was both cute and cumbersome. It was cute because there was like snowflakes like confettis... but cumbersome because I have cats and those darn confettis started floating everywhere and I had to try to catch them all to prevent the kitties from munching on them.

The first thoughts when you see the palette is "there's only 15 eye shadows!" so it seems that, for the regular price of 99$, that's not enough... but then you notice that it's actually full size shadows (vs. regular palettes that have substantially smaller shadows) so then the price per shadow is reasonable.

That being said, in a previous entry, I talked about what to look for in a palette (see Palettes - What to look for). Well, this one wouldn't make my cut: you can do some tone on tone applications with it but it's hard to make a full look and I'd probably need to supplement the colors with something else from my makeup stash.  I think that part of the problem for me is that these colors are much brighter than what I'm used to wearing. However, I can see some great cabaret looks possible with this palette but, again, you'd probably need to supplement a little with something from your stash.

I did do a makeup scheme yesterday with only the palette (and eyeliner and mascara). Here's the look! (Pardon the dazed look in my face: I was having huge contact lenses issues.)

And I tried it again today (less eye issues, eh?).


I gotta say that, when I played with the eye shadow, I could tell from the first pat that it's good quality makeup: it goes on smooth and has a good payload. As I mentioned above, I had huge contact lenses issues that day, which made my eyes water quite a bit and most makeup vanishes off my eyelids when that happens but this one stayed on.

Now the 100$ question: would I pay 99$ for the palette? The answer is: probably not. But then again I wouldn't pay 99$ for most palettes. It just seems like quite the amount for me. (See, as a makeup junkie, you need to feed the addiction on a regular basis and so that'd be the budget for quite a while. ;) Or one could say that I have makeup ADD. :p)  That being said, if you have the money to splurge and you like the colors on a palette, it may be a good investment: 99$/15 colors makes it 6.60$ for each color, which is a great price for the quality of the eye shadows.

I will keep the Starlooks subscription for at least one more month to see what a regular month is like.

Monday, December 17, 2012

Product Review - Mirabella Primer

I received this primer as part of the Ipsy subscription this month.  I tried the Mirabella - Prime for Face and Eyes for the last few days. I used it as a primer under my foundation/beauty balm but I haven't tried it as an eye primer as I am sure of my regular primer's results.

This is going to be somewhat of a Smashbox Photo Finish Primer vs. Mirabella Prime for Face and Eyes kind of blog entry as I do have a comparison that I can draw. ;)

The Mirabella product comes in a tube, which makes getting the exact amount you want. This is much easier than the Smashbox one, which is a funky tube and I seem to always get more product out than I wanted.

The formulation of the Mirabella product seemed very similar to the Smashbox one to me. Although, I have to say that, if you have oily skin, you may prefer the Mirabella one as it felt a tad less greasy/silky than the Smashbox product but not by much. Again, if you have oily skin, you may appreciate the fact that you can manage more efficiently how much you're actually using so that may be another plus for you for the Mirabella product.

I will have to try it as an eye primer because I have to admit that I'm rather skeptical that I will like it in that capacity. I think that it will feel a bit too greasy on my eyelid but I'll have to test it.

Price-wise, it's 29$ for 0.43 oz for the Mirabella product whereas a 0.4 oz Smashbox is 17$ (or 1 oz for 36$). I did feel like I was using less Mirabella product so it may turn out that the 0.43 oz would be equivalent to the Smashbox full ounce one. Time will tell.

I think that I'll need a little more time to decide whether I would purchase the Mirabella product over the Smashbox one but I have to say that I preferred the texture and feel of the Mirabella product so, based on that, it has a high likelihood of winning my favors.

Mirabella website:
http://www.mirabellabeauty.com/

Thursday, December 13, 2012

Stage Makeup Problems - No eyebrows

(This post was given away by a friend on Facebook but here are my thoughts on the topic.)

Another issue that I often see about stage makeup is dancers appearing to have no eyebrows.

It's a little known fact but eyebrows are VERY expressive and will convey the emotions from afar. Just stand in front of a mirror and do different facial expression and notice how your eyebrows change.

I'm naturally blonde under this mane of black hair so I have to color my eyebrows or else it looks like I have none. So I'm covered in that I HAVE to work on my eyebrows every day.

Now, if you have your natural hair color (or a color close enough to your eyebrows anyway), you may feel like you don't need to do anything to them. But that is where the pitfall is: even when I would have my eyebrows dyed, I needed to fill in my eyebrows... and everyone needs to!

Given the amount of makeup that we were for stage, the eyebrows, being fine hair, will just virtually disappear from your face. I'll do a full blown entry on eyebrows (which is an area where I'm still improving my skills on) but, at a high level, you just need to fill them in. You can use an eye shadow color and an angled brush (works the best to not apply too much) or a pencil that is in a shade close to your hair color and just apply the color over your eyebrows.  That's all that you really need to do and then your eyebrows will be visible again.

Wednesday, December 12, 2012

Stage Makeup Problems - No lipstick

I've seen this time and time again: dancers who either aren't wearing any lipstick or a shade that makes it look like there is no lipstick.  Lips are one of the very expressive features on your face so having them stand out is necessary to convey the emotion.  I've seen a few pieces where the dancers made the conscious choice to appear as if they didn't have lips because it went with the concept of their piece and, obviously, that's fine. However, for anything else, please have lips!

Make sure that the color that you are using is contrasting enough with your skin color.  There should really be only a few shades that would be off limits.  If you're in doubt, you simply can apply the color and pull back from the mirror and see what it looks like. If you don't see clearly that there are lips, then the shade is not the one that you should be using. ;)

Note: I talk about lipstick here but it could be a lip gloss. Lip glosses actually may be bigger culprits than lipsticks for this phenomenon.

Tuesday, December 11, 2012

Product Review - Pixi Lip and Liner Primer


I received the Pix Lip and Line Primer as part of The Look Bag back in October. The shade that we received was named "Nearly Clear". 

I didn't read much about it before using it but I figured that a lip primer was worth trying out. So I applied it a few times for performance under my lipstick, before lining the lips.  I really liked what it did: it made my lip area smoother.  It made my subsequent lip liner and lipstick application more even.  I was already hooked.

Then, last weekend, I read about what the liner primer does. They say that it creates a barrier at the lip area so that the lipstick doesn't bleed. I figured that it was worth trying so I applied the lip primer first and then I applied the line primer as if it was a lip liner. Then I lined my lips and applied the lipstick.  I do have another trick to prevent the lipstick from bleeding (more on that in another entry) but the result was even better than my typical trick! The lipstick looked very even and did not bleed one iota. And that one lipstick bleeds on my lips quite a bit.

Another thing that they say that the lip primer does is neutralize the lip color. That wasn't true for me but then again it's called "Nearly Clear" so, given how pigmented my lips are naturally, it probably wasn't enough to really neutralize them.

At first, I thought that the price of 18$ was too much for a mere lip primer but, after having used it, I can say that, yes, I would purchase it again at that price when it runs out. I really like what it does for my lips.

Monday, December 10, 2012

Palettes - What to look for

As the Holiday season is upon us, you'll see more and more new palettes being released. The reason is very simple: it's an easy gift to give to someone. So, yes, indeed, you could ask for some makeup for a gift!  Or, if you get a gift certificate for a makeup place, you most certainly can purchase a palette.

(Note: I will do an entry about "if you have XX amount to spend, how would I recommend you spend it... coming soon.)

Why purchase a palette?
First off, why would you purchase a palette instead of individual colors? Well, with individual colors, you'll get your choice and get bigger sizes, for sure. However, I do love a good palette as it's a handy way to carry a bunch of colors together in a (generally) small space.  One thing that often happens as well is that, while I may not love all the colors on the palette, even those colors that I thought I'd never wear somehow end up on my eyelid at some point or another (i.e., sometimes, you don't know that you'll need a color until you actually need it :p).  In some cases (e.g., Too Faced palettes), the colors will be pre-arranged for you into looks. It will generally not be contrasting enough for stage as they assemble these looks for everyday (or special occasions) but it gives you a starting point.

Size does matter
When it comes to palettes, size does matter... but not necessarily in the way that you think. ;) I like for my palettes to be on the small size as I want them to fit in my travel makeup case. So I find that my big whole 78 eyeshadow palette rarely travels with me as it's rather big and I'd rather not have it encumber my luggage.

Also watch out for overpackaging. You'll end up paying for that packaging anyway and it takes more space than it needs to. What I mean by "overpackaging" is those palettes that have a lot of space in-between colors and like a bulky (but likely very cute) box. Things like that.

Now, if you're not going to travel with the palette, its (small) size is not as important.

The "a < big number > $ value" trick
Don't be fooled by the "this palette is worth 96$ but you can get it for 36$!" ploy. Companies do that to make their palettes look more attractive.  The way that they calculate the full price of the palette is based on how much it would cost you to buy each color individually at full size... but the colors in the palette aren't full size. So don't even bother looking at the other value but the actual sale price for the palette. It's really truly pointless. The question is: is the price something that you're willing to pay for what you get?

Color selection
When selecting a palette, you'll want of course to assess the color selection. I once made the mistake of purchasing a palette that I thought I would absolutely love because there were so many super nice dark colors... but that's all that the palette had: dark colors. So I end up rarely using it because I need to supplement the palette with other colors to do a complete look. Therefore, I would recommend that you look for a palette that has both dark and lighter colors. A typical makeup scheme will have a medium color on the eyelid, a darker color at the crease, and the lightest color at the brow bone; you'll want to ensure that you can do this with the given palette.  Again, it's not mandatory that it stands alone but you may find yourself not using a palette as much if it can't.

Finish selection
Pay attention to the finish of each of the colors. Are they all matte? All shimmery? Most people prefer having a mix of finishes for variety but it's really a personal thing. The only thing that I would advise against would be having all shimmery or frost eye shadows as that becomes a bit much to pull off but not impossible.

Broader palettes
There are palettes that have more than just eye shadows: they may have also some blushes and lipstick. Those can be useful if you want to have everything in one package but I have to say that, generally, you'll get a better deal out of a focused palette but, again, it's a personal thing.

Thursday, November 15, 2012

Stage Makeup Problems - Not enough makeup

I will do a series about "stage makeup problems" that I've witnessed in my travels. Now, the easiest thing for these would be to show you pics... but that would mean showing specific individuals and I don't think that's fair. Also note that, while I do travel a lot for belly dance and see a lot of shows, these entries will not be about specific shows but just general things that I have seen on my travels.

Now onto this first entry...

I dare say that the #1 problem that I see in stage makeup is not having enough on. You need way more than you would for an everyday look to be visible on stage. There are multiple factors that are contributing to this.


  1. Distance
    Just by the sheer fact that there is some distance between you and the audience (generally a good 5-10 feet at a minimum), you will need to have more makeup on to have it seen.
  2. Bright lights
    If there are actual stage lights, then they will make your face look instantly several shades whiter than you normally are and it's like your makeup has just washed away/vanished. So, again, you'll need to have more.
  3. Dim lights
    Dim lights are the opposite effect in the sense that it will make everything appear darker... but, again, if you're barely wearing anything, you'll just look like you're wearing nothing.
I love to joke that you need to look utterly unnatural to look natural on stage and in pictures. For all that I say it jokingly, it actually is very true.

So, when you're wondering whether you have enough makeup on your face, chances are, it's not enough. One tricky thing is that, when you're putting on your makeup, you'll be very close to the mirror and, therefore, it will seem strikingly excessive... If you've reached that point, then you probably have just about enough... or maybe you could have more. It all depends on what you're used to.  Most people wear very little to no makeup on a regular basis... so if I'm asking you to put on makeup like you're a drag queen, of course, it will feel ridiculous and like it's way over the top. But that's what you need to look polished on stage. Seriously. 

I've had people laugh at me when they see me apply makeup on a friend and I'll pull away a good 5 feet before deciding whether I need to apply more or not (and whether it's even or not). I know, it looks like I'm an artist painter... but, really, it's the same thing: that painting won't be seen from nearly as close as the painter is... same with the makeup. What you can do yourself (and I do that a lot) is pull away from the mirror by at least 5 feet and see what it looks like. You'll be surprised at how quickly the makeup that you thought was good ends up vanishing.  So do make sure to do that "silly" step as it will be a good indicator of what it will look like on stage.

Now the cool thing about distance and lights and all is that it will hide a host of sins... so if, while you're close to the mirror, you think that you've messed up grandly and the makeup is uneven, look at yourself from 5 feet back... it's probably fine. If not, you'll likely not need to correct the makeup by nearly as much as you'd think. ;)

Wednesday, November 14, 2012

Update on previously reviewed items

There are a number of items that I've reviewed or talked about that I wanted to give an update on so here it is.

Dr. Jart+ Beauty Balm
Original review: http://celestesmakeupcorner.blogspot.com/2012/09/dr-jart-beauty-balm.html 
I've been using this product for about 2 months now and I still very much love it. It's actually interesting how I haven't been using my liquid foundation but once since then. For stage makeup, though, I use a different foundation and that hasn't changed. But the beauty balm does such a great job at evening my skin (and quickly!) that it's hard to not use it. The liquid foundation, while being close to my skin tone, is actually not as close. (I am THAT fair.)

As if that wasn't enough, I've noticed that the wrinkles on my forehead are vanishing. Now, it could be due to some other factor but the timing of me starting using the beauty balm and the wrinkles disappearing indicates that it would be directly due to the use of the beauty balm. And I'm really happy with this, of course. I didn't know that this would happen at all. Whoot!

Kate Somerville True Lash Enhancing Eye Makeup Remover
Original review: http://celestesmakeupcorner.blogspot.com/2012/10/product-review-kate-somerville-true.html 
I ended up purchasing the full size product because I really liked a couple of things: 1) the lengthening of the lashes (I now have long, full, lush lashes... :D) and 2) because it leaves my eyelid so much more moisturized! The latter was a big issue that I hadn't noticed was an issue until I tried this product.  I used to wake up with such dry eyelids in the morning but not anymore. So that, in and of itself, makes the pricier product worth it. AND, I get the bonus longer lashes. ;)

Birchbox
Original review: http://celestesmakeupcorner.blogspot.com/2012/09/birchbox.html
I had a great box in October and I'm actually happy with the box this month as well. I have yet to receive it but I know what I'm getting. ;)  So it's looking like I'll keep the subscription going for a while.

In October, I received: Kérastase Chroma Sensitive (hair product), blinc Eyeliner (liquid liner), beautyblender (a makeup sponge... pretty neat, actually), theBalm Mary-Lou Manizer (makeup highlighter), and Kusmi Tea Paris (yup... tea).

In November, I will receive: Archipelago Pomegranate Body Soap, Marula Omega Rich Facial Oil (will be great for my dry skin), ModelCo FIBRE LASHXTEND Lengthening Mascara (it looks like it might be full size!), Oscar Blandi Pronto Texture & Volume Spray (they had good reviews on the Birchbox site), and John Varvatos Artisan (men cologne... so Jeff gets a gift :p).

Ipsy/MyGlam
Original review: http://celestesmakeupcorner.blogspot.com/2012/10/ipsymyglam.html
I received the November bag yesterday and it's really cool. I'm really happy with what we received. The theme was "Party Perfect" and the items were: Starlet eyeliner in chocolate (full size; not a color I normally use but we'll see), theBalm Meet Matt(e) eyeshadow (it's like a dark plum color), Nailtini Nail Laquer in Millionaire (full size; a gold sparkly color), bareMinerals Marvelous Moxie lip gloss in Daredevil (a berry color), and the "or" product that I received was Chella Defining Eyebrow Gel (I was actually happy to receive this as I'm receiving a mascara in the Birchbox and I'm always looking for ways to improve my eyebrows, especially for stage).  I haven't had a chance to play with any of these yet.  One of my students has subscribed to Ipsy and has received this bag too and was happily showing it off at class last night and another student now is considering taking a subscription. lol Seriously, for 10$, it's pretty darn good.

The Look Bag
Original review: http://celestesmakeupcorner.blogspot.com/2012/10/review-look-bag.html
I hadn't seen what was going to be included in The Look Bag but I decided to cancel the subscription.  The thing that made me the most disappointed is that I learned that not only were some of the products discontinued (so, really, you're not getting your value as much, are you?) but one of them was actually expired. It was the Stila eye shadow. Not that it matters much for powder eye shadows: trust me as a microbiology major, not much grows on powder eye shadows. But, still, yanno, it didn't sit right with me. Especially, once they were alerted by subscribers that the eye shadows were expired, they still sold the bag as is. What I had seen as a small preview for this month was a glitter eyeliner. It could be fun but, yanno, I just didn't want to risk having products that I would be meh about in the end.

Monday, November 12, 2012

Makeup over makeup

This entry also could be titled "When you're too lazy to redo it all." Ahem. In the entry about how to freshen up the makeup (http://celestesmakeupcorner.blogspot.com/2012/10/how-to-freshen-your-makeup.html ), I mentioned that you could re-apply the eye shadow and that it didn't need to be the exact eye shadow.  Well, this is what we're talking about here.

A few weeks ago, I worked all day and then was going out to see a show that night and decided to just re-apply the eye shadows with an entirely new scheme and I remembered to take pictures to showcase what it looked like before (or rather midway) and then after. ;)

Why the entry could also be called "When you're too lazy to redo it all" is because, obviously, the simplest (in a way) would have been to completely remove all the makeup and then re-apply. I just didn't feel like redoing my face (beauty balm, concealer, powder) so that's why I re-applied only the eyes. See, for all that you can try to target only the eye area when removing your makeup, it's bound to spread some of it on your face and then it gets much simpler to remove everything... but then you need to re-apply everything.

I unfortunately didn't think to take a pic with my daytime look first.  But this is what you can see on  on your right here (so my left eye).  What I was wearing there was Mutt (Stay There shadow by Buxom) with the Expensive Pink (MAC eye shadow) layered over it.

On the left here (so my right eye), you can see that I had applied the new color scheme over it... and the peach color is not showing up at all. I did have a trick for it. ;)

The trick simply was to apply Blackground (MAC Paint Pot) over the peachy color. It's a black creamy formulation so it totally blocked out the peach and made for a good new base for that lavender color.  Now, this creamy formulation can be slippery, especially over an existing color so you really need to pat it down. That's also how you build it. Whereas I would normally apply just one layer of it for a regular makeup application, I applied two layers to really block out that peach.


So... what else was I wearing?  This picture showcases what it looked like once I was done.

Over that Blackground, I applied Barbarella (Eye Dust) by Medusa's Makeup in Barbarella.  At the crease, it was Psychedelic Sister by Urban Decay.  At the brow bone (which you can't really see that I was wearing something), I applied Buttercup (eye shadow by then Bare Escentuals [now Bare Minerals]; color discontinued; it's a pale yellow).

I then re-applied the eyeliner and the mascara and I was ready to go.

Here is a picture of what it looked like with my eyes open.


Note that applying makeup over makeup works really well when you have a "masking agent" like the Blackground and then you can apply whichever color you want. If you will apply powder over powder, then it needs to be darker to cover the lighter color... or it will just tweak the color. Again, not that it's bad: it can actually be quite cool. But it's just something to keep in mind as you're thinking of lazily covering up what you already have on your eyelids. ;)

Links:

  • Stay There eye shadow by Buxom:
    http://www.sephora.com/buxom-stay-there-eye-shadow-P267305?skuId=1280221
  • Eye shadow by MAC:
    http://www.maccosmetics.com/product/shaded/154/363/Products/Eyes/Shadow/Eye-Shadow/index.tmpl
  • Paint Pot by MAC:
    http://www.maccosmetics.com/product/shaded/154/1573/Products/Eyes/Shadow/Paint-Pot/index.tmpl
  • Eye Dust by Medusa's Makeup:
    http://www.medusasmakeup.com/eyedust.htm
  • Eye shadow by Urban Decay:
    http://www.sephora.com/eyeshadow-P309813?skuId=1402635

Friday, November 2, 2012

Product Review - Be a Bombshell Eyeliner

This eyeliner was part of MyGlam/Ipsy bag for October. We got a full size product of this one. http://celestesmakeupcorner.blogspot.com/2012/10/ipsymyglam.html

Let me start off by saying that, at 10$ a month for a subscription, this eyeliner more than paid for my subscription as the regular price is 14$. ;)

This eyeliner is a hybrid between a pencil eyeliner and a liquid liner. The product that is being delivered is liquid. However, I've worked with felt tip liquid liners before and this Be a Bombshell eyeliner is far superior. The advantage is, as the picture showcases, the pen-like shape that is pointy to wider. So it gives you far more flexibility in how you are applying the liner than either a conventional brush that accompanies a liquid liner or the felt tip liquid liner. You merely need to angle the pen a little bit and will give you a wider line. If you keep it straight, it's going to give you a very thin line.  Essentially, I found that it was extremely easy to use the pen.

The black line that it yields is also very intense, which I really liked. It is very much akin to what a liquid liner would give you and, indeed, it is a little liquidy. Contrary to liquid liners, though, it's not nearly as liquid so it dries quickly and you have less risks of unwanted smudges.  That being said, given that it dries uber quickly, it doesn't smudge well at all, which means that you'll likely need to use something different if you want a smudged line.

Note that, given its liquid nature, I wouldn't use it at the lower lid waterline (you never want to put a liquid liner there... burns like hell... yes, I know that from experience). I did apply it at the lower lash line with great success, actually and it made a very nice line.

The price is 14$, which is on par for non-pharmacy eyeliners (they range around 15-20$) but is obviously more than pharmacy things and e.l.f. products.

I gotta admit that I'm madly in love with this eyeliner and will likely purchase it again once I run out.  I also would highly recommend it to anyone who wants to have a liquid liner application but isn't used to doing it. This is so much easier to apply!

In this pic, I'm wearing the Be a Bombshell eyeliner.

Wednesday, October 31, 2012

Everyday Gold and Eggplant Makeup


Today, we're talking a simple makeup. The pics were actually taken at my cube (hence the bad lighting and the beige walls).  Note that I will often do more dramatic makeup schemes but, today, I felt like doing something a bit more muted. Went with my mood.

The palette that I used for this is called Mother Earth by Smashbox. It no longer is available but you can use similar colors to achieve the same results.  I used everything but the blue eye shadow from this palette. ;) I even used the peach blush.


In addition to the palette, I also used Stay There eye shadow by Buxom in Mutt. http://www.sephora.com/buxom-stay-there-eye-shadow-P267305?skuId=1280221

Here are the steps for this look; note that there are some steps that are optional:

  1. I applied the eye primer all over the eyelid to the brow and at the lower lash line as well. As usual, I used Shadow Insurance by Too Face.
  2. (Optional) I applied 1 layer of the Mutt eye shadow on the eyelid and at the lower lash line.
  3. I applied the plum colored eye shadow all over the eyelid using a fluffy round brush. I brought it up in the crease as well and at the outer corner of the lower lash line.
  4. I dusted 1 small layer of the gold eye shadow over the plum from the inner corner of the eyelid to about 1/3 to 1/2 of the eyelid (i.e., I didn't apply it all over the eyelid but just the inner portion).
  5. (Optional) If I hadn't applied the Mutt eye shadow, I would have applied the gold eye shadow at the lower lash line.
  6. (Optional) I applied the beige (top left color on the palette) eye shadow at the brow bone.
  7. I lined the upper lash line with black eyeliner.
  8. (Optional) I applied some black eyeliner at the outer corner of the lower lash line. That is, in the lash line itself.
  9. I lined the lower waterline with black eyeliner.
  10. I applied mascara.
  11. I applied the peach blush on the cheeks.

Tuesday, October 30, 2012

Golden Cabaret makeup


Apologies for the "meh" quality of the pics. ;) This was after a night of dancing at Greek Islands so the makeup is not as fresh as could be but, as can be evidenced, the primer did its job again. ;)

Here is the list of items that I used for this look.


And here are the steps that I did for this makeup:

  1. I applied my primer (Shadow Insurance by Too Faced) all over my eyelids up to the brow and a little at the lower lash line.
  2. I applied 1-2 layers of Indianwood color paint pot all over the eyelid to the crease.  I also applied 1 layer to the lower lash line.
  3. I applied 2-3 layers of the True Gold eye shadow over the Indianwood (so both on the eyelid and at the lower lash line).
  4. I applied the Hepcat eye shadow at the crease and along the lower lash line at the outer corner.
  5. I applied a little bit of Carbon eye shadow at the crease and outer corner of the lower lash line. It needs to not completely cover the Hepcat but rather just to better define the crease. So it's a very small amount. The first picture showcases it the best.
  6. I dusted the Aspen Summit eye shadow over the brow bone for contrast. I also applied a little bit of it at the inner corner of the eye.
  7. I lined the upper eyelid and the lower lid waterline with the e.l.f. cream liner.
  8. I applied mascara.
  9. I added some sparkly false lashes. I believe that I had purchased those at Kroger. They have a small amount of glitter on them.

Note: Instead of using the bareMinerals eye shadow, you could totally apply glitter to the eyelid. That would give it an extra pop of shine (and, yes, I've done that).  If you do, however, you'll still need to apply the Glitter Glue by Too Faced (or other glitter primer) as the paint pot formulation won't be sticky enough to hold onto the glitter.

Friday, October 26, 2012

Ipsy/MyGlam

When I was contemplating joining a sample subscription program, I was debating whether to subscribe to then MyGlam now renamed Ipsy or just Birchbox. Then, last month, I received an e-mail that seemed interesting enough for me to try it.

Let me backtrack and explain what this is. Like Birchbox and The Look Bag, you get samples monthly. Different than Birchbox (but akin to The Look Bag), everyone gets the same samples. For the October bag, though, they did customize the colors that they sent in for makeup based on how you had answered the beauty quiz. The idea of course is to make you happy with the color selection for you vs. having random colors that may or may not work.

Also, I've already referred to it as a bag... that is how it's commonly referred to and that's because it does come in a bag. We're not talking a little pouch like The Look Bag but a real beauty bag, as can be seen on the pic.  So, each month, you get a new bag like that. I have to wonder a bit what I'll do with all the bags if I were to subscribe for a while but these are handy so I'm sure that I'll figure it out.

Now, also contrary to Birchbox but akin to The Look Bag, there were 2 full size products! That was really neat.

What sold me to take the subscription for October was that they said that the theme was going to be "bombshell". That was quite enticing, I have to say.

So what did I receive? From left to right on the pic:

  • Pequi oil hair treatment by Couture Colour (deluxe sample)
  • What's your type? "The Body Builder" mascara (that is the name of it, I swear!) by the Balm (deluxe sample)
  • Lip Bomb by Mirenesse (full size)
  • Quad eye shadows by Coastal Scents (deluxe sample)
  • Be a Bombshell eyeliner (full size)
Someone had calculated the price of all the items on the Makeup Talk message board and it was over 70$ in value. So a great deal.

Now, I have to give a fair warning that, just like the Birchbox boxes are not all created equal, same thing for this bag. In previous months, it was all about hair and things like that. Hence why I hadn't taken the plunge in August nor in September. I don't know the theme yet for November but they have announced that they will have a deluxe sample of They're Real mascara by Benefit in at least a portion of the bags (it is an "or" item). We've also seen the bag and it looks like this one only it's all black.

I will definitely keep my subscription for November and will likely just keep it for a while.

Note: I will review the products individually, as I do with the other subscriptions. ;)

Wednesday, October 24, 2012

How to freshen your makeup

So you've been wearing your makeup all day and then need to go out in the evening and don't have time to completely redo your makeup... or you just don't feel like it. What can you do? Here are some tips and tricks.  You don't have to do them all: it's up to you to choose which ones you do.

Mist and set spray
If you absolutely have no time whatsoever to freshen your makeup, consider just spraying your eye area with a makeup mist and set spray. A number of companies have these but the one that I use is by e.l.f. and can be found at Target for 3$. This will re-brighten your makeup and will make it appear as if it had been applied more freshly than it has.

Note: If you will do any other steps but want to do this as well, use the spray as your last step.

Eyeliner
Probably THE thing that will give away how long ago the makeup was applied is your eyeliner, especially if you apply some at the lower lash waterline. But, just in general, the eyeliner has a tendency to chip off a little. So you may want to reapply it. No need to take what you had off: you can just apply over it.

Mascara
While the mascara won't disappear off your lashes, it will be a little "duller" than when you freshly applied it so applying a new coat over what you already have will help making it look fresher.

Loose powder
If you apply loose powder, you may want to reapply. It will even out your skin back again. This is a step that I especially do during the summer time as I'm bound to have had some sweating that changed the color of my face. If you have an oily complexion, this may actually be your #1 step to do.

Note: You may need to re-apply the blush if you do re-apply loose powder.

Eye shadow
You may want to re-apply your eye shadow. It all depends on whether it has creased or otherwise washed off your face during the day. If you've used an eye primer, it shouldn't have done that but, depending on the heat, allergies, rubbing at the eyes, etc., it could have. Also, you could apply a different color! It could change the color. If it's much darker, then that color will be the prominent one. If it's in the similar range of hue, it will tweak the color, which may be fun.

If you've used only one eye shadow on your eyelid that morning, you could totally finish up the look by applying something at the crease and brow bone.

Note: If you will apply an eye shadow, especially on the eyelid, you'll want to wait until that is done before re-applying the eyeliner. Otherwise, you'll cover the eyeliner with the new shadow and need to re-apply the eyeliner yet again.

Blush
I generally don't need to re-apply the blush but you may. If I'm doing multiple steps, I may re-apply a bit just to make sure that the cheeks also look fresh. ;)

Lipstick/lip gloss
It kind of goes without saying that the lipstick/lip gloss will likely need to be re-applied.  That is, if you wear these.

What to pick?
As I've already mentioned, you most certainly don't have to do all these steps.  What you pick will be utterly dependent on the time you have, how your makeup looks like currently (i.e., it will change depending on the day), and where you're going/what you'll be doing.

Generally, my minimal steps are eyeliner, mascara, and mist. That takes about 2-3 minutes to do. More if the eyeliner somehow got real messed up but that's very rare.  Then the rest will be dependent on how the makeup is looking and what I want it to look like. ;)

Tuesday, October 23, 2012

Product Review - e.l.f. Daily Brush Cleaner

A few weeks ago, I was running out of my usual brush cleaner (MAC Brush Cleanser; http://www.maccosmetics.com/product/135/307/Products/Accessories/Tools/Brush-Cleanser/index.tmpl ) and I decided to try the e.l.f. Daily Brush Cleaner.  The price is much cheaper (MAC: 14$; e.l.f.: 3$) so I figured that maybe I could save money this way and I've tried many e.l.f. products that I ended up actually liking better than the MAC products so maybe this would be the case too.

It sure wasn't.

I tried spraying the product on the brush directly as they said. I tried spraying the product on paper and then wiping the brush as I do with the MAC product normally. I tried a mix of both. It just wasn't cleaning the brushes to the same level as the MAC product does. Now they do recommend that you use the Daily Brush Cleaner for a daily clean and then the shampoo once a week to clean deeply. Yeah... no... I'll do it all in one step, thank you.

Another thing that had me disappointed was that the cleaning was so not up to the level that I was used to with the MAC product that my pencil brush was actually not doing a good job when I tried to apply the gel liner with it. I had to resort to using a liquid liner because it just wasn't working.

It also required more product from the e.l.f. product vs. the MAC product... and then if you do a size comparison, it's 3$ for 2 oz vs. 14$ for 8 oz. So the saving is really not nearly as much as I had originally thought it'd be.

The MAC product has some component in it that makes the brushes dry faster and the e.l.f. product doesn't. That's not a big deal for me as I rarely will do applications requiring the same brushes in a close time frame but it could be an issue for someone who does. Or if I ever had the need to completely revamp my makeup for something.

The only thing that I did like about the e.l.f. product, though, was the smell. It smells much nicer than the MAC one does.  But, really, that's not enough to make me purchase this product ever again.

Monday, October 22, 2012

Youtube Tutorials

Years ago, as I was on my quest for good makeup, I stumbled upon youtube tutorials of makeup. I believe that it was through good old Tribe (remember that site?). So here are my "go to" ladies.

Lauren Luke aka panacea81
Lauren was the one that I had found the link for via Tribe. I got a ton of good tips and tricks from her older videos.  I haven't been following her much lately.

Makeup Geek
She often has products reviews and all and has started to do tutorials that include hair as well.

Queen of Blending
She can be quite outrageous in her makeups. That being said, those will be awesome for stage! You may even feel like toning it down (like I did for the silver and black makeup scheme).  She does deserve her name in that she blends her shadows like no other.

Searches
Nowadays, quite honestly, there's tutorials for anything and everything. Whether they are good or bad is in the eye of the beholder. But you are bound to find inspiration in plenty of places. Besides these lovely ladies who are my list, you could do a search for whatever makeup you're thinking of and will most likely find pics, tutorials, etc. So don't hesitate to google it up. ;)

Friday, October 19, 2012

Review - The Look Bag

I discovered through a makeup message board other subscription services besides Birchbox. I'm not going to review them all (as tempting as it sounds), but there was one, The Look Bag, that I decided to try, based on having seen others posting what was in the bag. Contrary to Birchbox, this one is more uniform in what it sends subscribers so, since I liked what others were posting, I purchased.  I also discovered that it is a re-launch of their sample program. So we'll see what will happen (and if I'll keep the subscription).

So I received a York lip balm with sun protection (SPF 15), a foot scrub by Bare Foot, a crackle nail polish by Pop, an eye shadow by Stila (it's a black color... hard to tell on the pic, I know), and a lip primer by Pixi.As with all my other subscriptions, there was a little card also that explains the products.  There was also a little pink bag that held the items.

What swayed me to purchase the bag were the full size nail polish and the full size Stila eye shadow. The Pixi is also a full size item so it felt like it might be a good value.

The subscription is 12.95$ per month. I had a coupon to get 20% off (coupon code: TLB) so that made my total like 9.71$. At that price, it seemed like a real good deal. The difference with other subscriptions (besides a slightly higher price) is that the next billing is on your anniversary date in the month vs. the 1st of the month for other subscriptions. The advantage? If you troll message boards, you should be able to see what those who are getting their subscription early in the month are getting and, if you're not happy, you could cancel your subscription.

Through the same message board, I discovered, though, that the Stila eye shadow and the nail polish are actually discontinued items. So that was a bit of a bummer. It's not like you're trying them out and can purchase them later. Then again, they are full size so you'll have plenty of those for a while. It also means that the value should be technically less.

Do I still feel like it was worth spending the money on it? I do, actually. But, again, I was making an educated decision when I purchase, instead of going in blind.  I suspect that I will keep the subscription for at least one more month. But, yes, I will check what others are receiving before letting the charge go through. ;)

Links:
The Look Bag:
http://thelookstore.com/thelookbag

makeuptalk (message board; linking specifically to the one about general monthly subscriptions):
http://www.makeuptalk.com/groups/show/11/subscription-sampling-programs

Thursday, October 18, 2012

Foundation formulations

There are many types of foundations:  liquid, cream, powder, combination of cream and pressed powder, etc.  It is highly important that you find which one works better for you.  Foundation (especially for everyday use) generally should feel like you have nothing on (it might not be so for stage makeup... more on that in a future blog entry).  If you find that you feel the foundation on your skin and it annoys you, then this isn’t a formulation that works well for you (try another one).

One of the worst mistakes that people do when selecting foundation is to test the color on the top of the hand.  The top of the hand is not exactly the same color as your face and, therefore, will potentially make you choose the wrong shade.  The foundation for everyday use should match your face color as close as possible (this will be different for performance).  If your skin can get a suntan (mine can't), also note that the color does change with the season. So it's possible that you may need 2 colors: one for winter and one for summer.

The second worst mistake is stopping application right at the jaw line.  You should apply it slightly beyond (i.e., towards the neck) so that it doesn’t create a line right at the jaw; the foundation needs to blend in towards the neck.

This is the sequence (roughly) of how I apply foundation:
  1. Start application on a cheek and expand towards the hairline (make sure that you get all the way to the hair), jaw line, and nose.
  2. Apply on the eyelid, making sure to go all the way to the brows and down to the cheek bone.  You could omit this step if you are applying the foundation after application of the eye makeup for everyday use.  However, I generally prefer to put some foundation on the eyelid anyway to ensure that the whole face is the same color.
  3. Repeat Steps 1 and 2 on the other side. (Or you could have done both cheeks before going to both eye areas.)
  4. Apply on chin and the area above the lips.
  5. Apply on forehead, making sure to apply all the way up to the hairline and remembering to bring the application down on the temples.
  6. Apply on nose.
  7. Assess whether your application makes your face look even.
There are conflicting opinions on when foundation for everyday use should be applied:  before or after application of eye makeup.  I've done both.  Right now, I apply it before.  It’s really a matter of preference as to which one you prefer:
  • Before:  If you apply it before your eye makeup, it preps (somewhat) your eye area too and can ensure that the color all over your skin will be even.
  • After:  If you apply it after your eye makeup, it removes the fallout from the makeup application that may have fallen on your face.  There are other methods to take care of that.

Liquid Foundation

Liquid foundations typically come in many different formulations for different skin types.  They often have an SPF 15 in it too, which is an advantage.  Due to their light texture, they are generally the preferred formulations out there.

Sponge method:
  1. Pour some foundation in your off hand, near the wrist.
  2. Dip your sponge lightly in the foundation.  Dip lightly again whenever necessary.
  3. Use downward strokes if you have a naturally even skin.  Pat the sponge on your skin (still going in a downward motion) if your skin is not even.
Q-tip and sponge method:
  1. Dip Q-tip in foundation.  Dip again for each of the lines that you will apply.
  2. Apply one line on each cheek.
  3. Apply a small line on the chin.
  4. Apply a line on the nose.
  5. Apply a line on the forehead.
  6. With the sponge, blend the lines into the skin in the same order as you applied the lines, blending all over your face.  Remember to also do above your lip, your eye areas, and the temples.

Cream Foundation

You will notice that this type of foundation does not cover as much as liquid.  That’s normal.  It also feels heavier and, if you have oily skin, you may not like this formulation.  Whatever skin type you have, you still want to use a light coat of foundation with a cream foundation to minimize the heavy feeling.

To apply:
  1. Use a sponge to get a little foundation on it.  It’s better to dip more often than get too much on your sponge.
  2. Use downward strokes.

Powder Foundation

Powder foundations generally are the bare minerals kind.  Their advantage is that they are real good for your skin to the point where you could sleep in them and it’s fine.  You can also sweat in it without any issues.  A lot of the bodybuilder ladies who wear makeup at the gym use bare minerals because of that.  Some with oily skin will love this formulation as it absorbs the oil.  I liked them for a while but then I thought that my face looked too powdery.

To apply:
  1. Dip lightly a big fluffy powder brush in the powder.  Use a circular motion in the cap to even the powder on the brush and remove excess.
  2. Use a circular motion to apply the foundation.  The bare minerals brands call it “buffing.”

Combination Cream and Powder Foundation

This type of foundation actually contains both a cream foundation and a powder like you will apply in your 2nd step of makeup application.  It’s a 2 steps in 1 process.  However, it’s not exactly the same as applying a cream foundation and then loose powder.

To apply:  Use the same method as the powder foundation.  However, depending on the exact consistency of the formulation, you may want to just use downward strokes as opposed to the circular motion.

Wednesday, October 17, 2012

Silver and black eye makeup


I've had a bunch of folks ask how I did this makeup.  It ties in real well with the "how to apply glitter" entry. The list of steps are what I did. Below that, you will find first a link to the video that inspired this makeup and then the list of the products that I used.
  1. I applied my primer all over my eyelids up to the brow and a little at the lower lash lines. I used Shadow Insurance by Too Faced.
  2. I applied 2-3 layers of Stay There eye shadow by Buxom in the color Pug all over the eyelids to the crease.  
  3. I applied that Pug color at the lower lash line as well.
  4. I applied the Glitter Glue primer (by Too Faced) over the eyelid. I did one eye at a time for this step and the next.
  5. Using little dabs/pats, I applied .44 Magnum glitter by Medusa's Makeup.
  6. I defined the crease using a pencil brush and the e.l.f. cream eyeliner. This step really consists of putting a black line on your crease. It's also called a "cut crease" technique.  See also the video link below.
  7. Using a crease brush, I applied Buxom Stay There in Black Lab at the crease. I applied it over the black eyeliner line and going up (i.e., trying not to bring it down).  I also applied a little at the outer corner of the lower lash line, to connect the lower lash line with the crease line. That's how I get the flared look at the crease.
  8. I applied the Sephora Aspen Summit eye shadow on the brow bone.
  9. I lined the upper lash line with the e.l.f. cream eyeliner, making a winged tip/flared line.
  10. I lined the bottom lash waterline with the e.l.f. cream eyeliner, making sure to well define the inner corner.
  11. I applied mascara over the lashes. I later applied false lashes to the top eyelid as well.
  12. The lipstick is Dubonnet by MAC.
Here is the link to the makeup tutorial that inspired this makeup. I ended up toning it down as I felt that the original finished look was a bit too over the top (especially for what I wanted performance-wise at the time; the original makeup that I did like that was for a performance and I redid it for this photoshoot) and it wouldn't read well from stage as it is a lot of shading.  But this is where I first learned how to do a "cut crease" and got to idea to do it for this makeup.
http://www.youtube.com/watch?v=KhfOK1_72C0&feature=plcp

Links to the products:


Tuesday, October 16, 2012

False lashes


I often get questions around false lashes. They do take a long time to get used to so be patient with yourself.  They are a great tool to open up your eyes.  Some people put them on first, before putting all the eye makeup.  However, I will generally put them on last when I’m done with everything else in case I run out of time or have issues with them. 

Things to know:
Buy cheap ones: There is no need to purchase expensive ones because they will break just as fast (if not faster). Also, the cheaper ones tend to be sturdier so they will withstand manipulation a whole lot better than pricey ones. Especially when you're starting to use them, start with cheapy ones.

Where to buy: The best ones that I've found readily available were at Sally's.  They're big enough for stage.  They have also some okay ones at CVS, Walgreens, and Kroger. But they're smaller.  So I generally will wear them at Greek Islands where I'm close to people... or I'll double them up and wear two pairs for stage (that's a more advanced skill).

eBay: Do a search on eBay for false lashes and you'll find lots of Asian options. They come in boxes of 10 pairs and you can often find lots that have more than one style. They're really cheap price-wise, are very sturdy, and they are a good size for stage. You will likely need to cut them up to size a bit more than the pharmacy or Sally's versions would but they're at a fraction of the cost. Obviously shipping is slow so you'll need to plan in advance. And read the descriptions well because they will often lead you to believe that you'll get multiple boxes when, really, you'll get only one.


Glue: Don't bother with the glue that they provide with the lashes sometimes. That's cheap and rarely stays well.  For glue, I use the Duo Eyelash glue, which you can find at CVS. They also have a version that dries to black; it has pink lettering on the tube. http://www.cvs.com/shop/product-detail/Duo-Eyelash-Adhesive-Waterproof-Dark-Tone?skuId=307250


How to apply them:
  • When taking them out of the case, use your thumbs to press them down towards the bottom of that container. You will be less likely to break them that way.
  • Once they are out of the container, you'll want to wiggle them around as they will be too stiff.
  • You may want to assess whether they fit. Most eyelashes will fit unless you have real small eyelids.  If they are too long, you can cut them.
  • If the lashes are on a clear band, I will put some black eyeliner over that band so that they will blend better with my black line on the lid.
  • Apply a small coat of glue all along the band of the eyelashes. You'll find your own preference but you don't want it too thick nor too thin and you want it as even as you can muster.  I sometimes will just pour straight from the tube or will use the handle of an eyeshadow brush to apply the glue.
    NOTE: The glue that's at the tip may separate in the tube. So you want to squirt some glue on a tissue or something to get rid of that separated goop.
  • WAIT ~30 SECONDS before applying eyelashes.  That is the one step that a lot of folks skip.  To see if the eyelashes are ready, you can touch the glue and it should be a little tacky.
  • Start applying your lashes from the middle portion of the false lashes on your eyelid, close-ish to your natural lashes but don't sweat how close you are just yet.  Using the handle of a small eyeshadow brush, push the false lashes down towards your natural lash line.  Keep pressing softly the lashes down to your lash line on each side.  The best video that I saw that explained this is via the MAC website (it's easier to get what I'm talking about when you see it): http://www.maccosmetics.com/makeup_artistry/8940/Video/index.tmpl
  • Once the lashes are applied, you can turn them up by simply batting your lashes softly against your index finger.

Monday, October 15, 2012

My favorite brushes


Part of good makeup is having the proper tools: good brushes. And by "good brushes", I most certainly don't mean that you need to spend a lot of money on them. Some of my favorite brushes are a few dollars. With these tools, it will really be often a matter of preference in terms of what you like best for which application.

Back before I started on my quest for good makeup, I was sometimes stopping myself from using certain brushes because I didn't know what they were for. Well, that's just silly. The manufacturer may have stamped a name to a brush, indicating what it should be used for but, really, there is no "brush police" that will come give you a fine if you aren't using the brush exactly as intended. The only "sin" here is to not use the brushes.

Brushes sets

Again, even before the quest for good makeup, I had invested in a makeup brush set akin to this picture. If you do a search on eBay for "makeup brush set", you'll see plenty of these kinds of sets. The quality of the brushes is okay but you can get these for a very decent price (32 pieces for 10-20$ including shipping). A lot of the vendors will be in China and, actually, often these brushes are very akin to the higher end brushes.  One thing is that they tend to shed their bristles for a bit but then it stops.  It's definitely one way to get plenty of brushes for not too much money up front. And then you can subsequently replace your favorite brushes with higher quality brushes.  That's definitely what I did: I used the kit for many many years and I still use some of those brushes every now and then.

That being said, there are now a lot of options to get brushes at decent prices, so look around and you will likely find something that will fit in your budget.

My favorite brushes
Now onto my favorite brushes and what I use them for.  I use these on a near daily basis... if not daily, it's on a weekly basis for sure.

Sephora Classic All Over Shadow Brush Small - 13$
I love to use that brush to apply eye shadow all over the eyelid. It does great for pressed powders and some loose powders (especially the Bare Escentuals ones).
http://www.sephora.com/classic-all-over-shadow-brush-small-22-P188214?skuId=1014315


Sephora Pro Natural Small Eyeshadow Brush - Sold out
Unfortunately this brush is sold out but I love it and use it very frequently. It is stiffer than the one above so I love to use it to apply creamy eye shadows. So, whenever I apply the Buxom Stay There shadows, I use this brush.


e.l.f. Professional Eyeshadow Brush - 1$
I love this brush to apply loose powders eye shadows or glitter over the eyelid. It is a rather stiff brush so it's great for these applications. It does well also for regular pressed powders.


Sephora Pro Smoky Liner Brush  - 17$
(note that it's not exactly the brush that I purchased but the same shape and it's the same brand)  I love this brush to apply gel or cream eyeliner. I somehow prefer to use it for a stage makeup application but it can be used for any eyeliner application. The shape of it is what makes it so great: it is akin to working with a pencil eyeliner.


MAC Small Angle Brush - 19$
I use this brush to apply either cream or gel eyeliner and to do my eyebrows. I generally will use this brush for my regular makeup. I've had this specific brush for like over 15 years and it's still going strong with no signs of decline. 


e.l.f. Contour Brush - 3$
I use this brush to apply eye shadows at the crease of my eyes. It's a bit on the stiff side, which is real nice for when you want your crease shadows to stay put and not blend in too much. So I definitely use it for stage makeup. For regular makeup, it depends on the look that I'm going for.
http://www.target.com/p/e-l-f-contour-brush/-/A-13586149#prodSlot=medium_1_39&term=e.l.f.


Sephora Classic Rounded Crease Brush - 17$
This is similar to the e.l.f. Contour Brush in that I use it to apply eye shadows at the crease of my eyes. However, this one is fluffier and, as such, will automatically blend in the color a bit more. For regular makeup, that is generally what I want (but not always). For stage makeup, that's too much blending.


Sephora Pro Allover Shadow Brush - 20$
I love to use this brush to apply eye shadow at the brow bone. It covers a lot of surface. Now, depending on the size of your brow bone, this may be too large of a brush.
http://www.sephora.com/pro-allover-shadow-brush-12-P313029?skuId=1419571


e.l.f. Studio Blush Brush - 3$
I love to use this brush, as the name indicates to apply blush to my cheeks. It is the perfect size for me. I have encountered many blush brushes that are either too large or too small. This one's perfect for my cheeks.


e.l.f. Complexion Brush - 3$
I use this brush to apply loose powder to my face over my foundation. It has the perfect size and shape for it.